
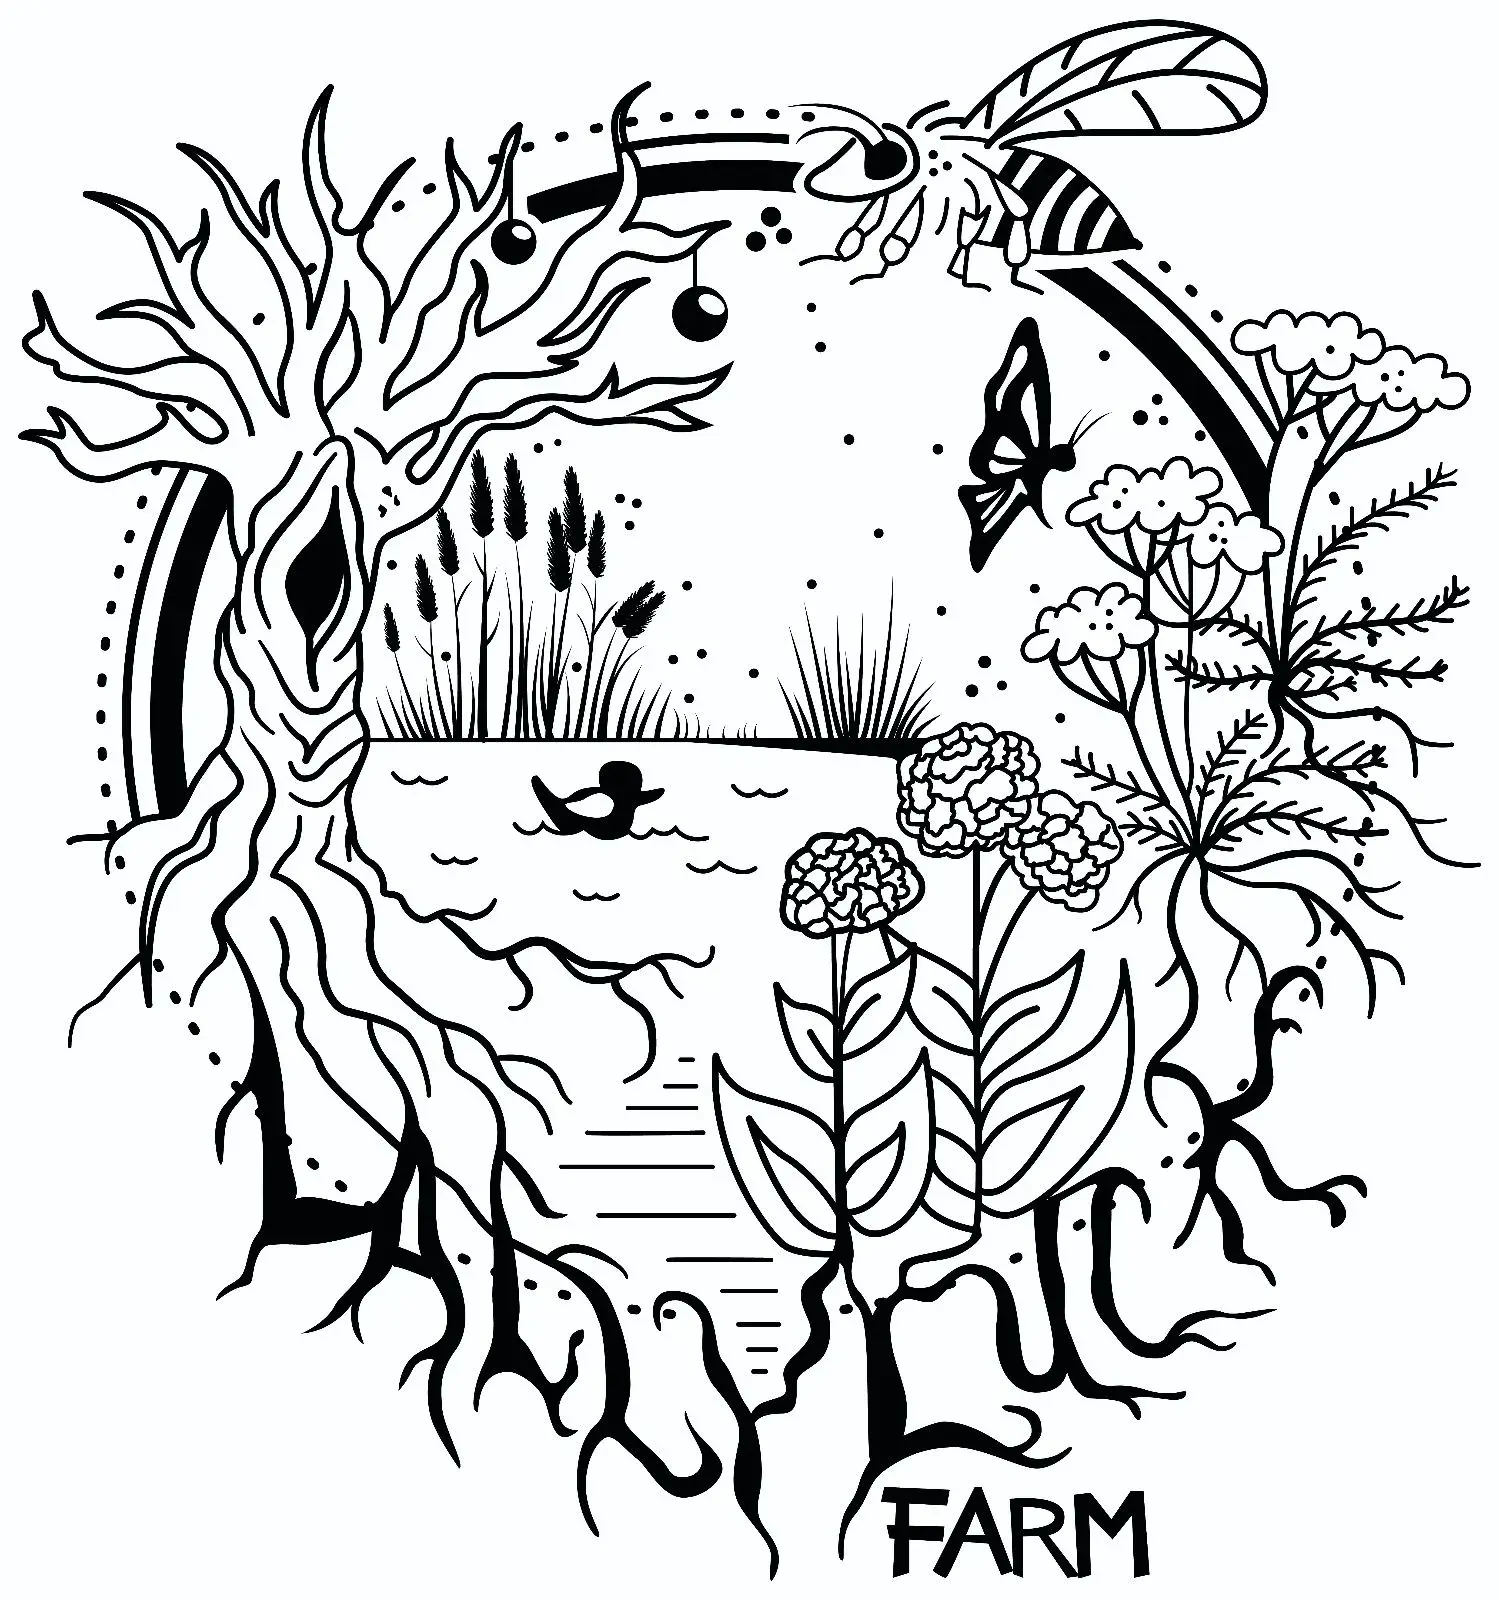
Hand done wood burning on mahogany. It’s an image from the game manual of Tunic (if you haven’t played, the manual is unlocked by finding its pages during gameplay). After cleaning up the enlarged image a little bit I transferred the image by hand with carbon paper before sitting down to do the burning in of the image.

starts on jan 14, can’t wait. great artwork, this game is on my wishlist!
Thank you! Super hype for it too. You should totally play it, it’s wonderful (I’m not good enough to hang with the speedrun hah)
I love this and I love the game! Well done
Thank you, it’s such a wonderful game that when I saw it on the lineup I knew what I had to do!
That’s amazing. Can you tell us some more about your process? Is it a hobby etc?
Thanks! It’s very much a hobby in that it’s an avenue of art therapy for me and a way to make gifts for folks, but I’ll pick up other projects to make for GDQ events or other fundraiser raffles.
Some folks are really good artists but I have real difficulty drawing freehand, so I’ll often find an image or several and either clean them up or arrange them with GNU Image Manipulator. Once I’m happy with the image I’ll print a copy to use as the template, and they get saved in a folder in case I want to make another piece with the same image. I transfer the image by hand tracing everything but shading over a sheet of carbon copy paper. Some folks will use a coated sheet (like a sheet of stickers with all the stickers removed, leaving just the waxy coating) to print onto with toner and then transfer the image using heat to release the toner from the paper, but tracing lets me teach my hand the image.
For the wood, I aim to get hardwoods milled S4S (squared 4 sides). Basswood is usually what you’ll find in craft stores and a common recommendation, but softer woods tend to have inconsistencies during the image burn and I think the character in hardwood boards is prettier. To prep the wood, I’ll sand the faces from 80 grit up to about 4k, taking short breaks in between changing grits to lightly spray the face I’m working with some water - the water helps to raise less prominent wood fibers as you sand to get a more consistent finish. The smoother the face, the easier it’ll be to move the burn tool’s tip to make the image.
I’m currently using a burn tool from Walnut Hollow with a temperature control built in, but started with a basic tool plugged into a soldering iron base with temp controls - the higher the temperature of the tool, the darker and faster resulting burn, but lower temps allow you to do shading in gradients. I’ll usually take an offcut from the piece I’m working on to block out the shades at each setting to use as a reference. The secret is to make millions of tiny circles, as though you were coloring with a ballpoint pen, which gives the burned areas a smoother finish. Without the tiny circular motion, you’ll end up with small pointillist type gouges where the tool rested too long and burned in deeper than the surrounding area.
Wow thanks for the intro. Can you also do it with a kind of electric arc? I remember seeing a video about how that’s very dangerous.
How did you get started?
Would you be interested in getting a greyscale depth map from me? I make all kinds of funky stuff.
I’ve seen some things made using that electric current setup that are really neat but it’s certainly riskier and requires some more intensive and intentional safety prep.
A friend gave me a small box he had decorated with the sigils from Skyward Sword (TLoZ) and I was instantly in love with the idea of doing it for myself. I’ve always enjoyed coloring books, to the point of scanning them to reprint them on better paper for ink pens, and used to ink the comics a friend drew when we were in high school, so the skill set for this goes back a ways. Woodburning is a hobby with a low barrier to entry but a high skill ceiling, and it’s fun to mix media in a way that’s distinct from working with paper.
Would you be interested in getting a greyscale depth map from me? I make all kinds of funky stuff
That sounds like such an interesting and challenging project, I’d sincerely appreciate trying my hand at interpreting something you’ve designed!
Well what kind of file do you need. Like a pdf with a fuckton of pixels? Like say A0 300 dpi.
That’s perfect! Thank you so much, I’m excited to see how to best translate it and find some complementary grain pattern for it
Ok I’ll get back to you in the next months I hope. My life has been nuts but since today there’s some stability again and so I can focus on these crazy ideas again :)