

My wife and I recently got a charcoal smoker/grill after our old bullet smoker finally rusted through. It came with a pizza oven attachment and we’ve been slowly perfecting our dough and cooking techniques.
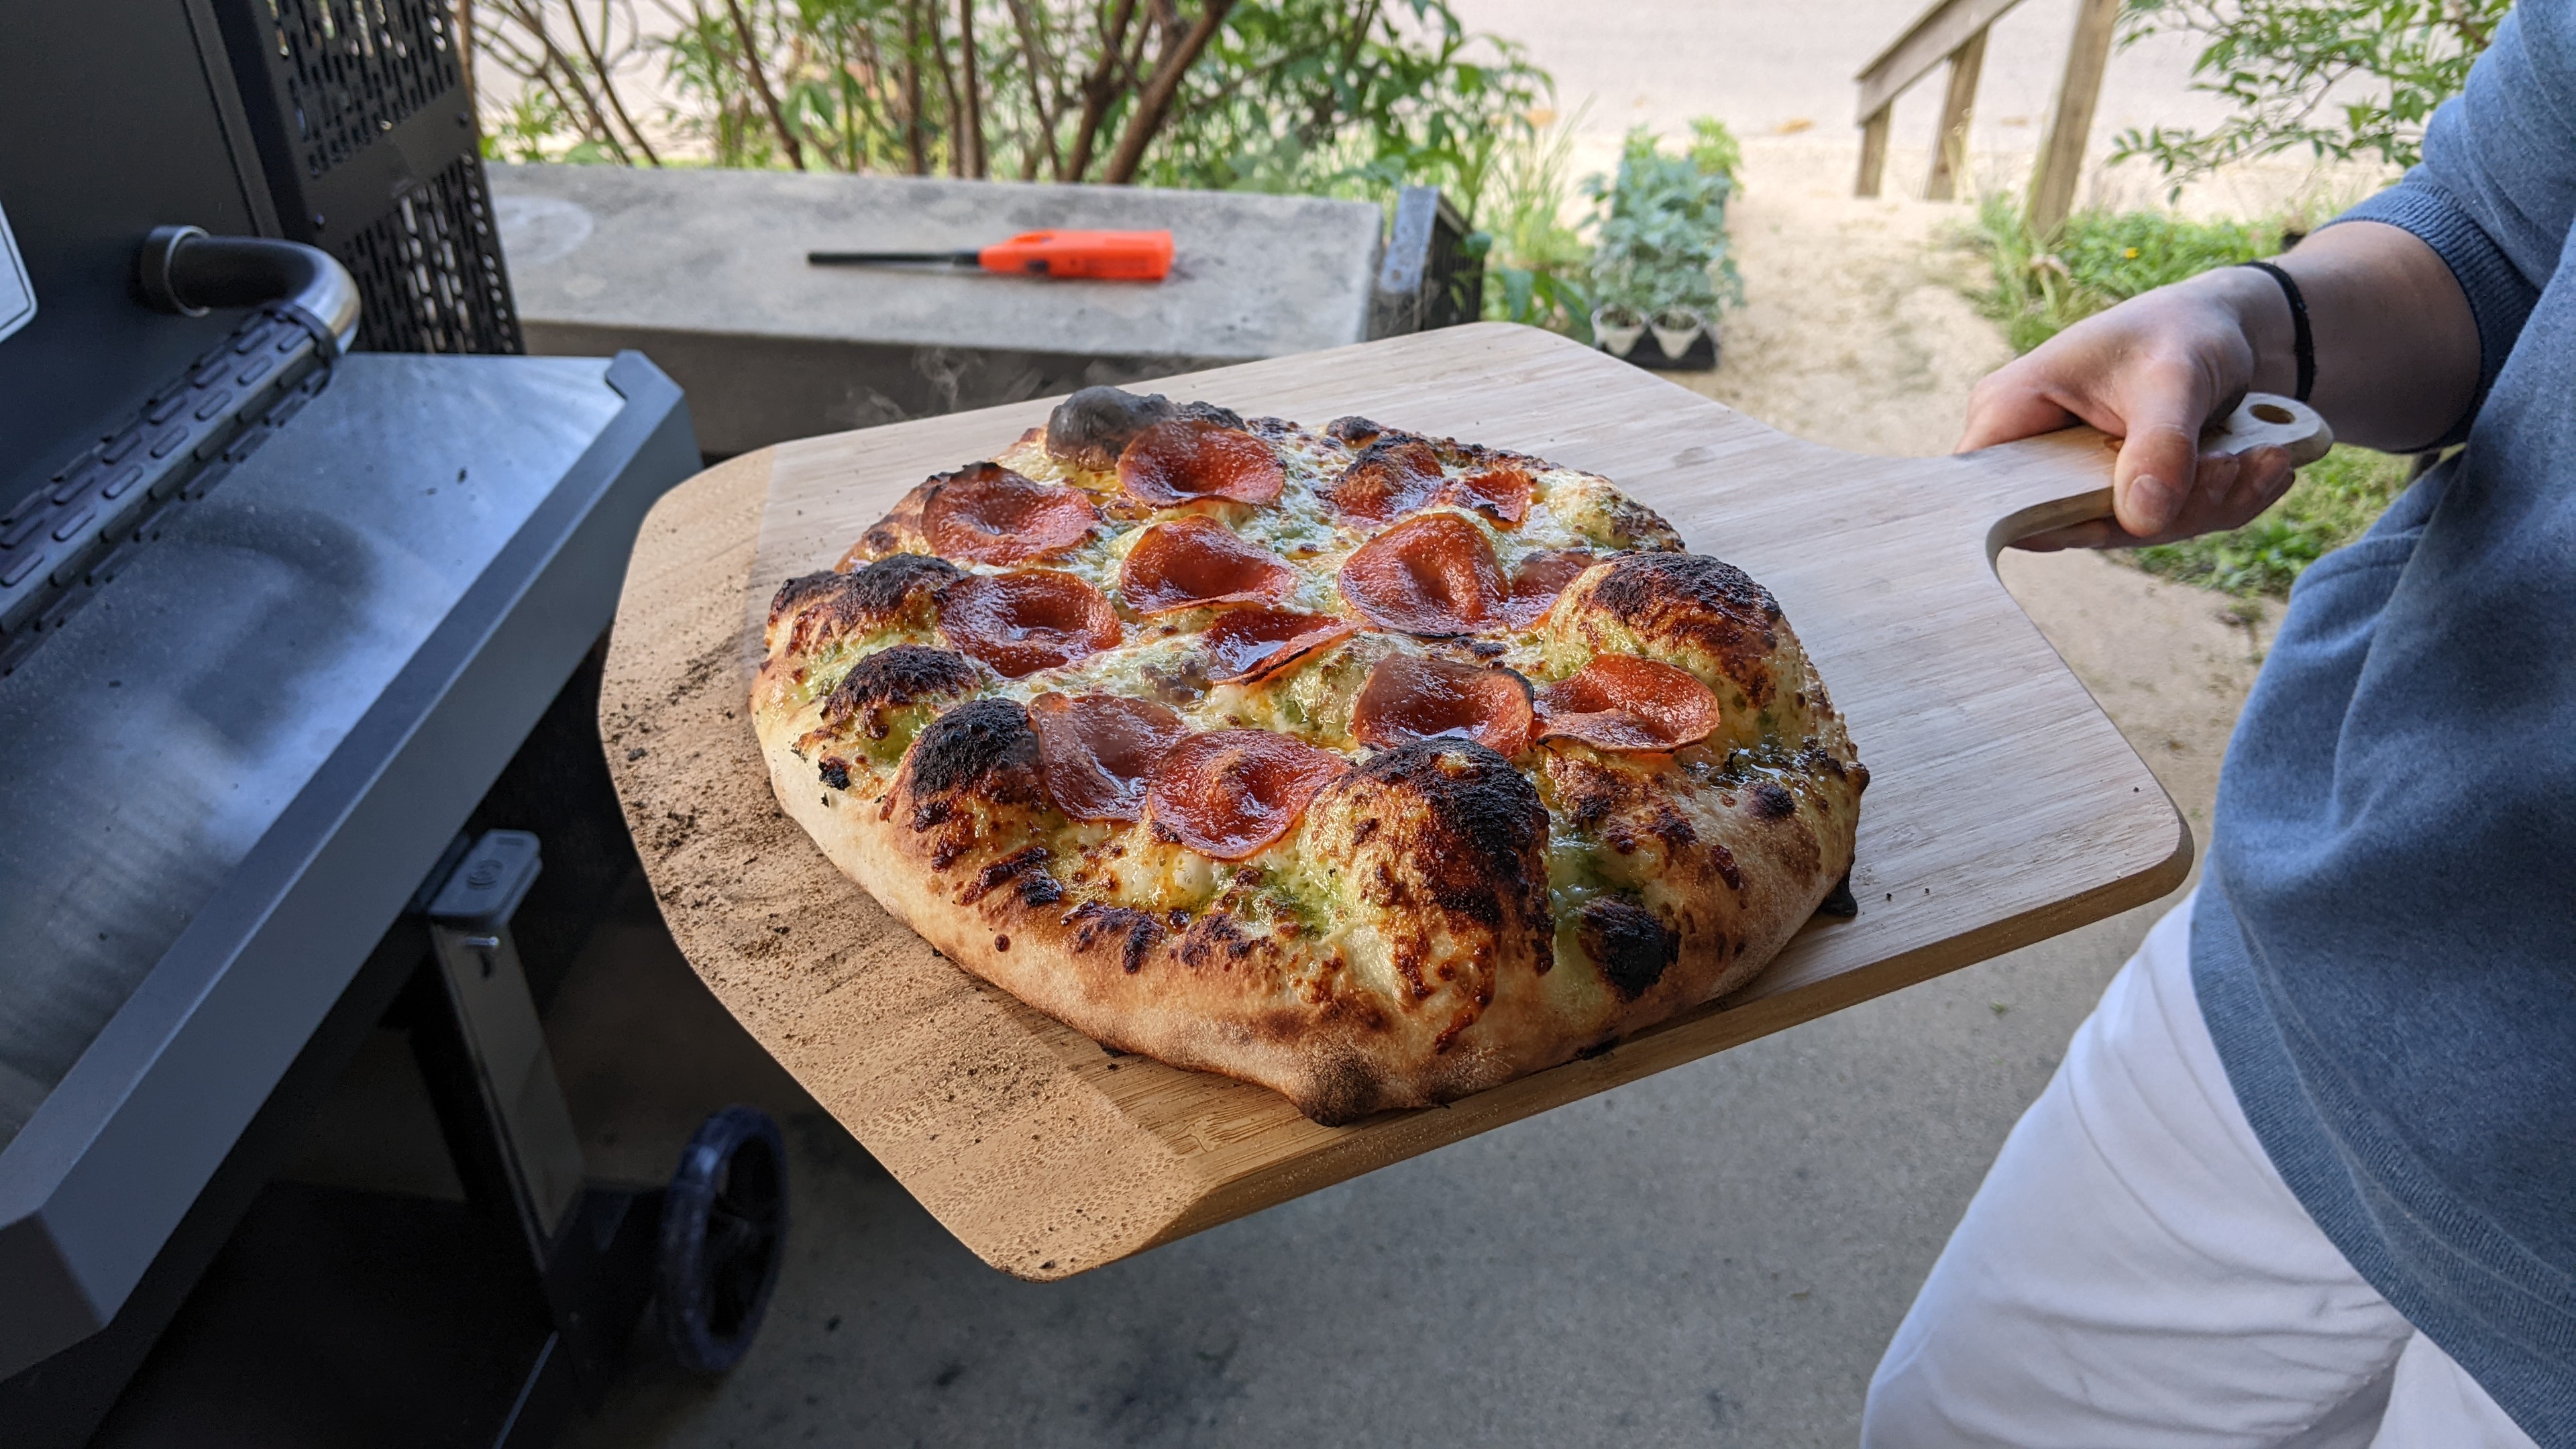
The combo of sourdough and high temperature baking produces the exact sort of crispy, chewy, slightly charred pizza experience I crave. We’re constantly rotating through different topping combos (and begging friends to come over so we can make more pizza without having to gorge ourselves).
Favorite so far is probably the spicy honey aged garlic pizza, but it’s all been fantastic. Any got any good pizza topping suggestions? Unusual options especially appreciated.

All the yes! I soo want a pizza attachment! Looks great!

That looks delicious
It tasted as good as it looks.
With how quick and easy it is to make pizza now (other than needing to start the dough a day or two before) we have been eating far more pizza than is probably reasonable.
Honestly if you really think about it pizza isn’t that bad for you. So long as you keep the toppings and cheese to a minimum. It’s all the processed crap you get at places like dominos that makes it so bad
This is what I keep telling myself…
looks great. our go-to toppings is onion and mushrooms, occasionally with a sweet balsamic glaze drizzle. good with shrimp ham or prosciutto, fresh mozzarella, pesto or tomato base
Ooo, balsamic glaze to drizzle is a great idea that had not occurred to me. I’ll have to give that a shot.
Red onions and mushrooms have been in our constant rotation for toppings as well. We had a friend over to join us on our pizza craze and he brought prosciutto as a topping to donate, which has convinced me I should maybe start keeping some of that around.
That looks amazing! I recently picked up Bread Illustrated by America’s Test Kitchen and their dough recipe blew me away. It sounds like yours must be similar with the 24hr+ dough recipe.
Anyway, I’m a fan of pineapple and pepperoni for toppings. I know pineapple is controversial but that sweetness with the salt of the pepperoni is pretty great.
Looking good! What’s your dough recipe?
I’m OP’s wife, he told me someone asked for the dough recipe and it’s just easier if I type it all out rather than dictate it all for him to type up.
Based off the date of this post, this would have been the final iteration of my sourdough pizza dough. If you don’t have a sourdough starter, I will also provide the regular yeast version.
Sourdough Pizza Dough
Yields 3 ~230 gram balls of dough, which I find is a great size for our pizza oven. Start at least the day prior to pizza making.
Ingredients:
-
90 grams active sourdough starter at 100% hydration
-
400 grams bread flour
-
200 grams water
-
9 grams salt
-
8 grams honey
Directions:
-
Mix all ingredients together in a mixing bowl until uniform, don’t bother kneading too much at this step.
-
Cover and let sit for about 1 hour. This is called an “autolyse”, which during which the flour hydrates and gluten begins developing. Some would probably disagree with me and say an autolyse is only water and flour. Regardless, it makes for less hand kneading, which I think is great.
-
Dump onto a non-floured (or lightly floured) surface and knead until smooth. The previous step should make it so that this only takes a few kneading motions. It’s a fairly low hydration dough, so it shouldn’t be too sticky.
-
Put dough back into a lightly oiled bowl (or the same bowl, now lightly oiled), cover, and let rise until puffy, not necessarily doubled in size (but it’s fine if it gets that big). For my starter, in the summer, this is usually about 3 hours.
-
Divide dough into three balls (should be 230-235 grams each), shape each into a ball, then rub each one with oil and place into separate lidded containers. I like to reuse this style of takeout container for this purpose, but use what you have.
-
Stash the dough balls in the fridge overnight or up to three days (this is the longest I’ve stored them, you could probably go even longer). Take out of the fridge about an hour prior to shaping to come up to room temp.
Non-Sourdough pizza dough
Yields 3 ~230 gram balls of dough, which I find is a great size for our pizza oven. Best started the day before, but could also be made day of pizza making.
Ingredients:
-
445 grams bread flour
-
245 grams water
-
9 grams salt
-
8 grams honey
-
1 teaspoon active dry yeast
Directions:
-
Mix all ingredients together in a mixing bowl until uniform, don’t bother kneading too much at this step. Try not to dump the yeast and salt into the same area of the bowl when adding all the ingredients.
-
Cover and let sit for about 1 hour.
-
Dump onto a non-floured (or lightly floured) surface and knead until smooth. The previous step should make it so that this only takes a few kneading motions. It’s a fairly low hydration dough, so it shouldn’t be too sticky.
-
Put dough back into a lightly oiled bowl (or the same bowl, now lightly oiled), cover, and let rise until puffy, not necessarily doubled in size (but it’s fine if it gets that big), about 1-2 hours depending on ambient temperature.
-
Divide dough into three balls (should be 230-235 grams each), shape each into a ball, then rub each one with oil and place into separate lidded containers. I like to reuse this style of takeout container for this purpose, but use what you have.
-
Stash the dough balls in the fridge overnight. You could probably also keep them in the fridge for up to a few days, but I’ve only done overnight with this version of the dough.
Bread nerd things, i.e. baker’s percentages: Both recipes are about 55% hydration, with 20% starter (technically 87 grams would be 20%, but round numbers) and 2% salt. Honey is also about 2%, the 8 grams was from a triple batch that I added 24 grams honey to, and scaled back down.
Thanks! I’m definitely saving this for later. Last couple times I tried to make pizza in my Kamado smoker, the dough came out less fluffy than I wanted, even with some sourdough starter. It was more like bread, and less like pizza. I’ll try this next time!
Awesome! Let me know how it goes!
@feeltheglee @somedude I cannot wait to try the sourdough version! Thank you for sharing!
-
